Jenkins is an open source, continuous integration/continuous delivery and deployment (CI/CD) automation software DevOps tool written in the Java programming language. It is used to implement CI/CD workflows, called pipelines.
Please follow the steps to install Java, Jenkins, Maven on Ubuntu 22.0.4 instance. Jenkins, Maven are Java based applications, so we need to install Java first.
Pre-requisites:
Pre-requisites:
- EC2 instance is up and running
- port 8080 is open in firewall rule
- connect to EC2 instance using Git bash or item or any SSH terminal
Steps to install Jenkins:
Change Host Name to Jenkins
sudo hostnamectl set-hostname Jenkins
Perform update first
sudo apt update
Install Java 11
sudo apt update
Install Java 11
sudo apt install default-jdk -y
Once install java, enter the below command
Verify Java Version
Append debian package repo address to the system

Now go to browser. enter public dns name or public IP address with port no 8080.
Verify Java Version
java -version
Maven Installation
Maven is a popular build tool used for building Java applications. Please click here to learn more about Maven. You can install Maven by executing below command:
sudo apt install maven -y
Maven is a popular build tool used for building Java applications. Please click here to learn more about Maven. You can install Maven by executing below command:
sudo apt install maven -y
Jenkins Setup
Add Repository key to the system
Add Repository key to the system
curl -fsSL https://pkg.jenkins.io/debian/jenkins.io-2023.key | sudo tee \
/usr/share/keyrings/jenkins-keyring.asc > /dev/null
echo deb [signed-by=/usr/share/keyrings/jenkins-keyring.asc] \
https://pkg.jenkins.io/debian binary/ | sudo tee \
/etc/apt/sources.list.d/jenkins.list > /dev/null
Update Ubuntu package
sudo apt update
sudo apt install jenkins -y
The above screenshot should confirm that Jenkins is successfully installed.
Access Jenkins in web browser
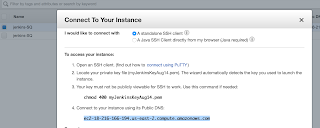
Now Go to AWS console. Click on EC2, click on running instances link. Select the checkbox of EC2 you are installing Java and Jenkins. Click on Action. Copy the value from step 4 that says --> Connect to your instance using its Public DNS:
Access Jenkins in web browser
Now Go to AWS console. Click on EC2, click on running instances link. Select the checkbox of EC2 you are installing Java and Jenkins. Click on Action. Copy the value from step 4 that says --> Connect to your instance using its Public DNS:

Now go to browser. enter public dns name or public IP address with port no 8080.
Unlock Jenkins
You may get screen, enter the below command in Git bash( Ubuntu console)
You may get screen, enter the below command in Git bash( Ubuntu console)
Also create user name and password.
enter everything as admin. at least user name as admin password as admin
That's it. You have setup Jenkins successfully. Please watch the steps in our YouTube channel:


No comments:
Post a Comment